I purchased them because I have my own from my grandmother or those given me as gifts and I always want back up or maybe an extra for barter or gift giving.
The first thing I do after bringing home 'someone else's' equipment is clean it. I use a gentle Dish washing soap, I am very careful NOT to use harsh chemicals that may leave behind unsafe residues.
 In a sink of hot soapy dish water, I soak the equipment to reconstitute any hard to see or near invisible food particles. I give the equipment a good scrub. Rinse with a pot of boiling water.
 After it is completely dry, I will oil it and wipe it with a paper towel to ready it for storage. That is the simple method if all the parts are simple and easy to get to and there are no rust stains.
 |
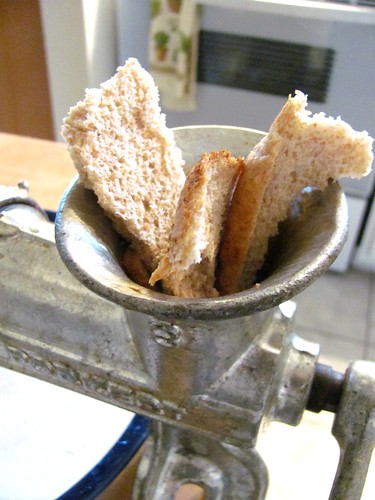
| a perfect candidate for cleaning my way, use the buttered bread technique with this one. crumble it a bit then grind! |
 |
Press the first piece of buttered bread into the hopper and start grinding, when it is starting to come out the other side, add the oatmeal and grind until it is almost gone then add the second piece of buttered bread. This dough followed by the oatmeal scrub followed by buttery dough gets into every possible curve and crevice.
The butter of the first bread slice lubricates the stains and the dough rolls past it taking the surface stain along for the ride. The oatmeal then scrubs the stains and absorbs some of the tainted butter lubricant then the second piece of bread cleans away the oatmeal leaving the grinder oiled and ready for storage. If the oatmeal is still really orange from the stain, run it through the grinder a second time before using the second piece of bread.
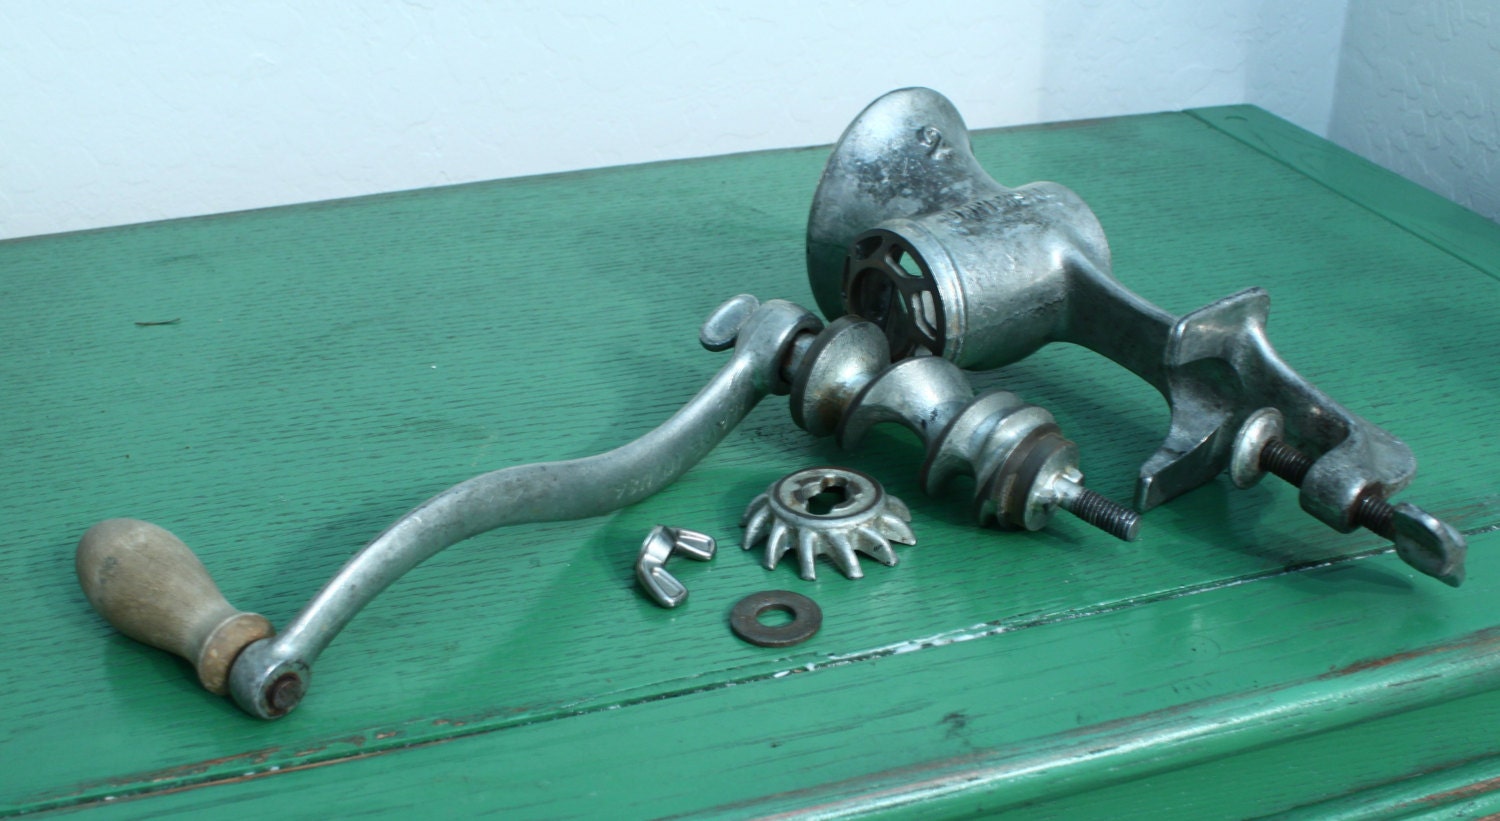
 Break down the grinder into it's parts, wipe with a paper towel and store the small parts in a zippered bag to protect it from moisture in the air.
 I would love to show you pictures of how I did this with the orange bread and the rust stained oatmeal but while I was in the middle of cleaning the grinder I recently bought, the thought of picking up my camera and taking pictures never occurred to me. I guess I am an, in the moment kind of girl! but, someone google imaged this photo while making stuffing, step by step.
Trust me, these instructions are the ones handed down by my grandmother and I have ever done it thus! Also, when grinding meat anytime, we kept the heels of the bread loaf nearby for grinding through at the end of a meat grinding session. The oils from the meat are enough to grease the wheels so to speak, but the bread pushed the last bit of sausage out of the grinder and absorbed the grease from the meat fats.
A thin coat of oil is sufficient to protect your grinder from rust. If you live in an extremely humid region, add some rice to the storage bag to protect from moisture. Change that out each time you use the grinder.
Clean, dried, oiled! That is the mantra of the food machine prepper. Keep your equipment clean, dry and oiled, it will serve you and yours beyond your lifetime!
No comments:
Post a Comment