 |
| en.wikipedia.org |
 |
| http://www.wickstore.com/Products/ Wedding-Day-Perfection-Floating-Candle -Retail-Pack__WDFC-500.aspx |
You can make your own floating wicks by waxing 100 % cotton and a cork. Cut a 12 to 18 inch long piece of 100% cotton embroidery floss. Hold it taut across a candle and pull and twist it as you drag it across the candle, waxing the thread. Cut cork, possibly a wine bottle cork into four or five slices. Or, you can purchase a cork sheet from the auto parts store, it is sold as gasket material and comes thin enough to cut with scissors. Thread a tapestry needle with the waxed cotton floss and push it through the center of the cork. remove the needle when you get it all the way through. There you have a cork wick that will float. Cut the wick to the length of the most common vessel you will fill with oil and store in Zippered bag until needed.
Now, all you have to do to make light, is find a vessel. Fill with oil and float your wick. Here are some suggested containers:
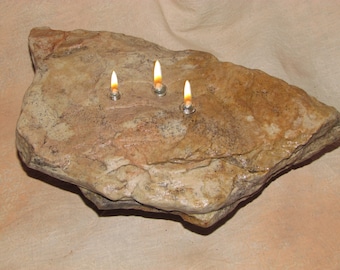 Drill a hole in the center of a ceramic floor tile or a nice flat bottomed rock. Attach a Pyrex glass bowl to the bottom with clear caulk. Fill the glass with oil and thread the wick from the top down by twisting it tight and pushing it in, then keep twisting an pushing. You will have to remove the wick to refill the well. Since I made my first with the twisting wick I have found a site that sells glass wick holders so the hole can be bigger and it is easier to load.
 |
| http://www.nationalartcraft.com/subcategory.asp?gid=5&cid=118&scid=251 |
 |
| down---to---earth.blogspot.com |
The oil lamp might be a good use for those big heavy glass ashtrays if you have given up smoking.
Drill a hole in a shell and thread the wick from the top down to the oil inside.
| TIP: To increase light, position lamp in front of mirror. |

No comments:
Post a Comment